Tutorial: Getting Started with Proksee
Overview
This tutorial will go over the following:
- Making a new project with an unannotated genome.
- Running the Prokka tool to find annotations for the genome.
- Adding the annotations as features to the map.
- Saving changes to the map.
- Downloading results.
The sequence used in this tutorial can be found in the table below.
| Tutorial Files | |
|---|---|
| Starting Sequence | GCF_019335785.1.fa |
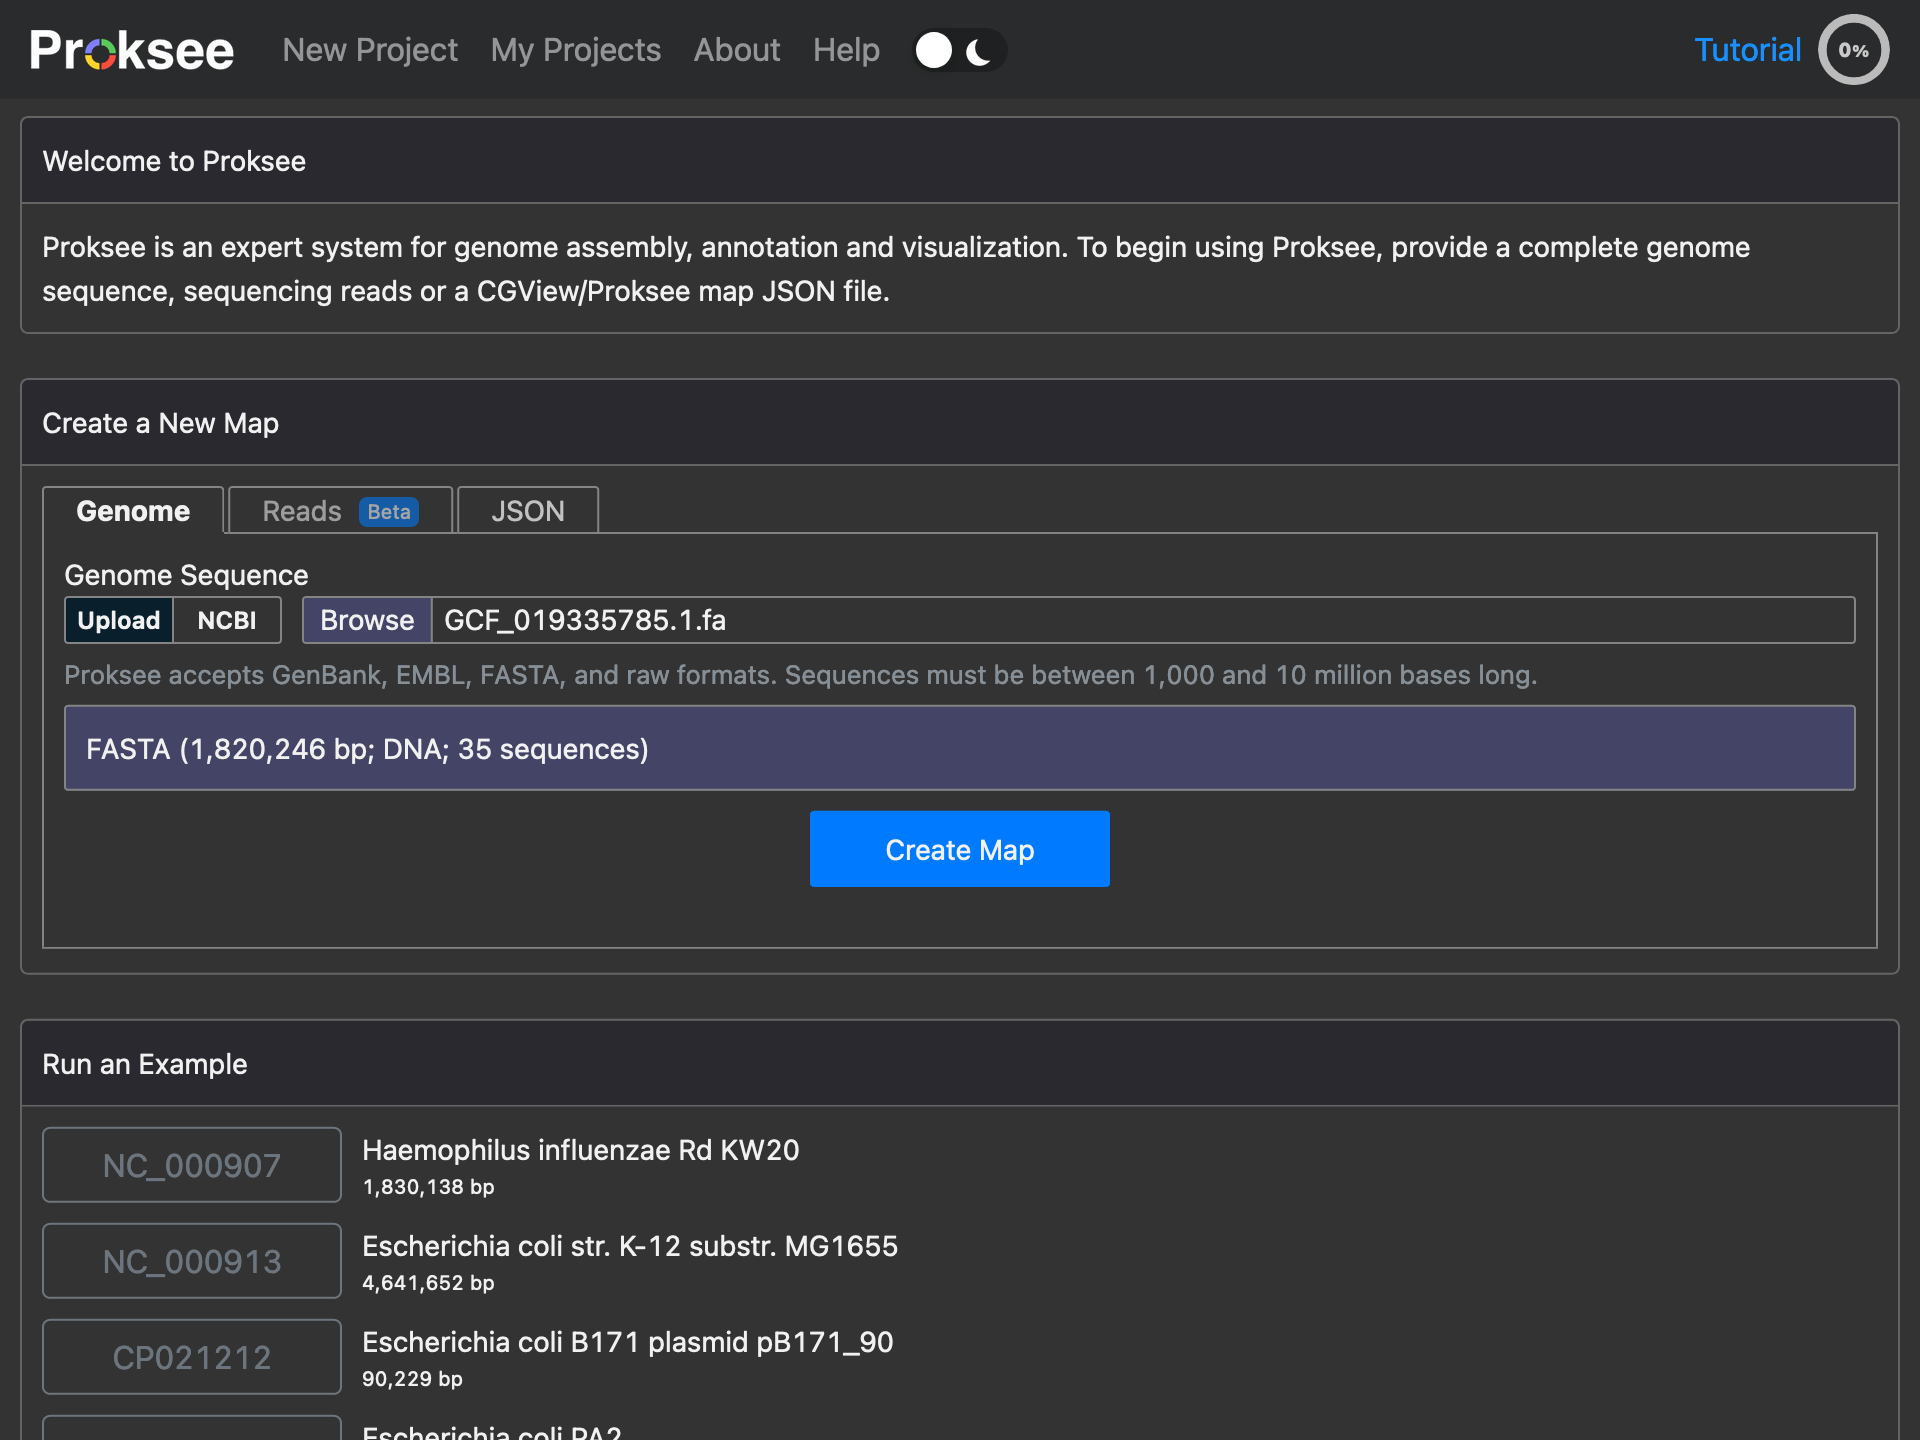
Start a new Project
- Go to the New Project page.
- Click Browse and select the example genome (downloaded from the above table).
- A summary of the selected genome will appear.
- Click Create Map.
Status Page
After submitting a job, you will be taken to the status page while the initial map is being created. Typically this only takes a few seconds. 
Project Page
When complete the project page will load with your new map. Most of the page will be taken up by the Map tab. To the right is the Sidebar with various panels for running tools, examining features, changing the map appearance and downloading image or JSON files.
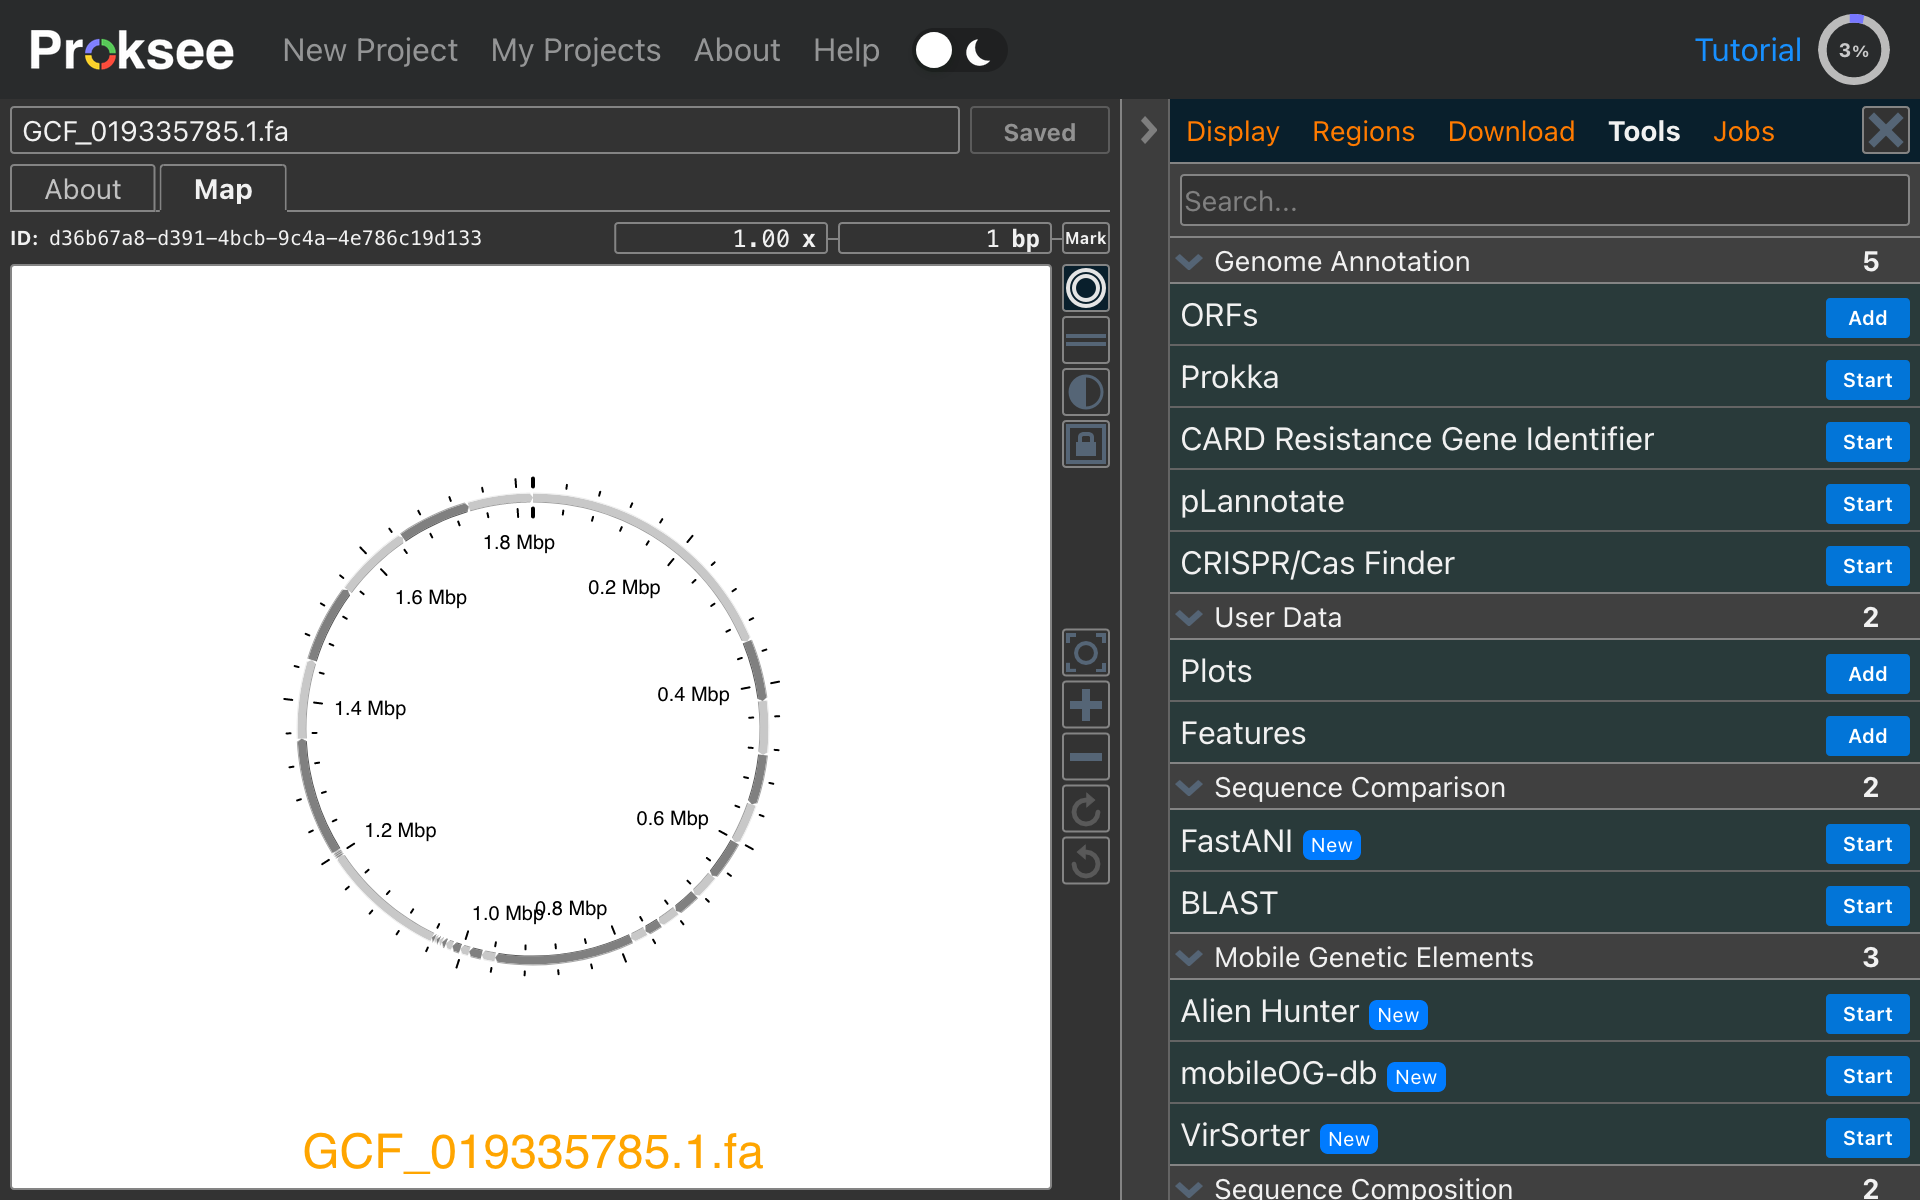
The map is most empty at this point. Let's add some annotations.
Starting a Tool
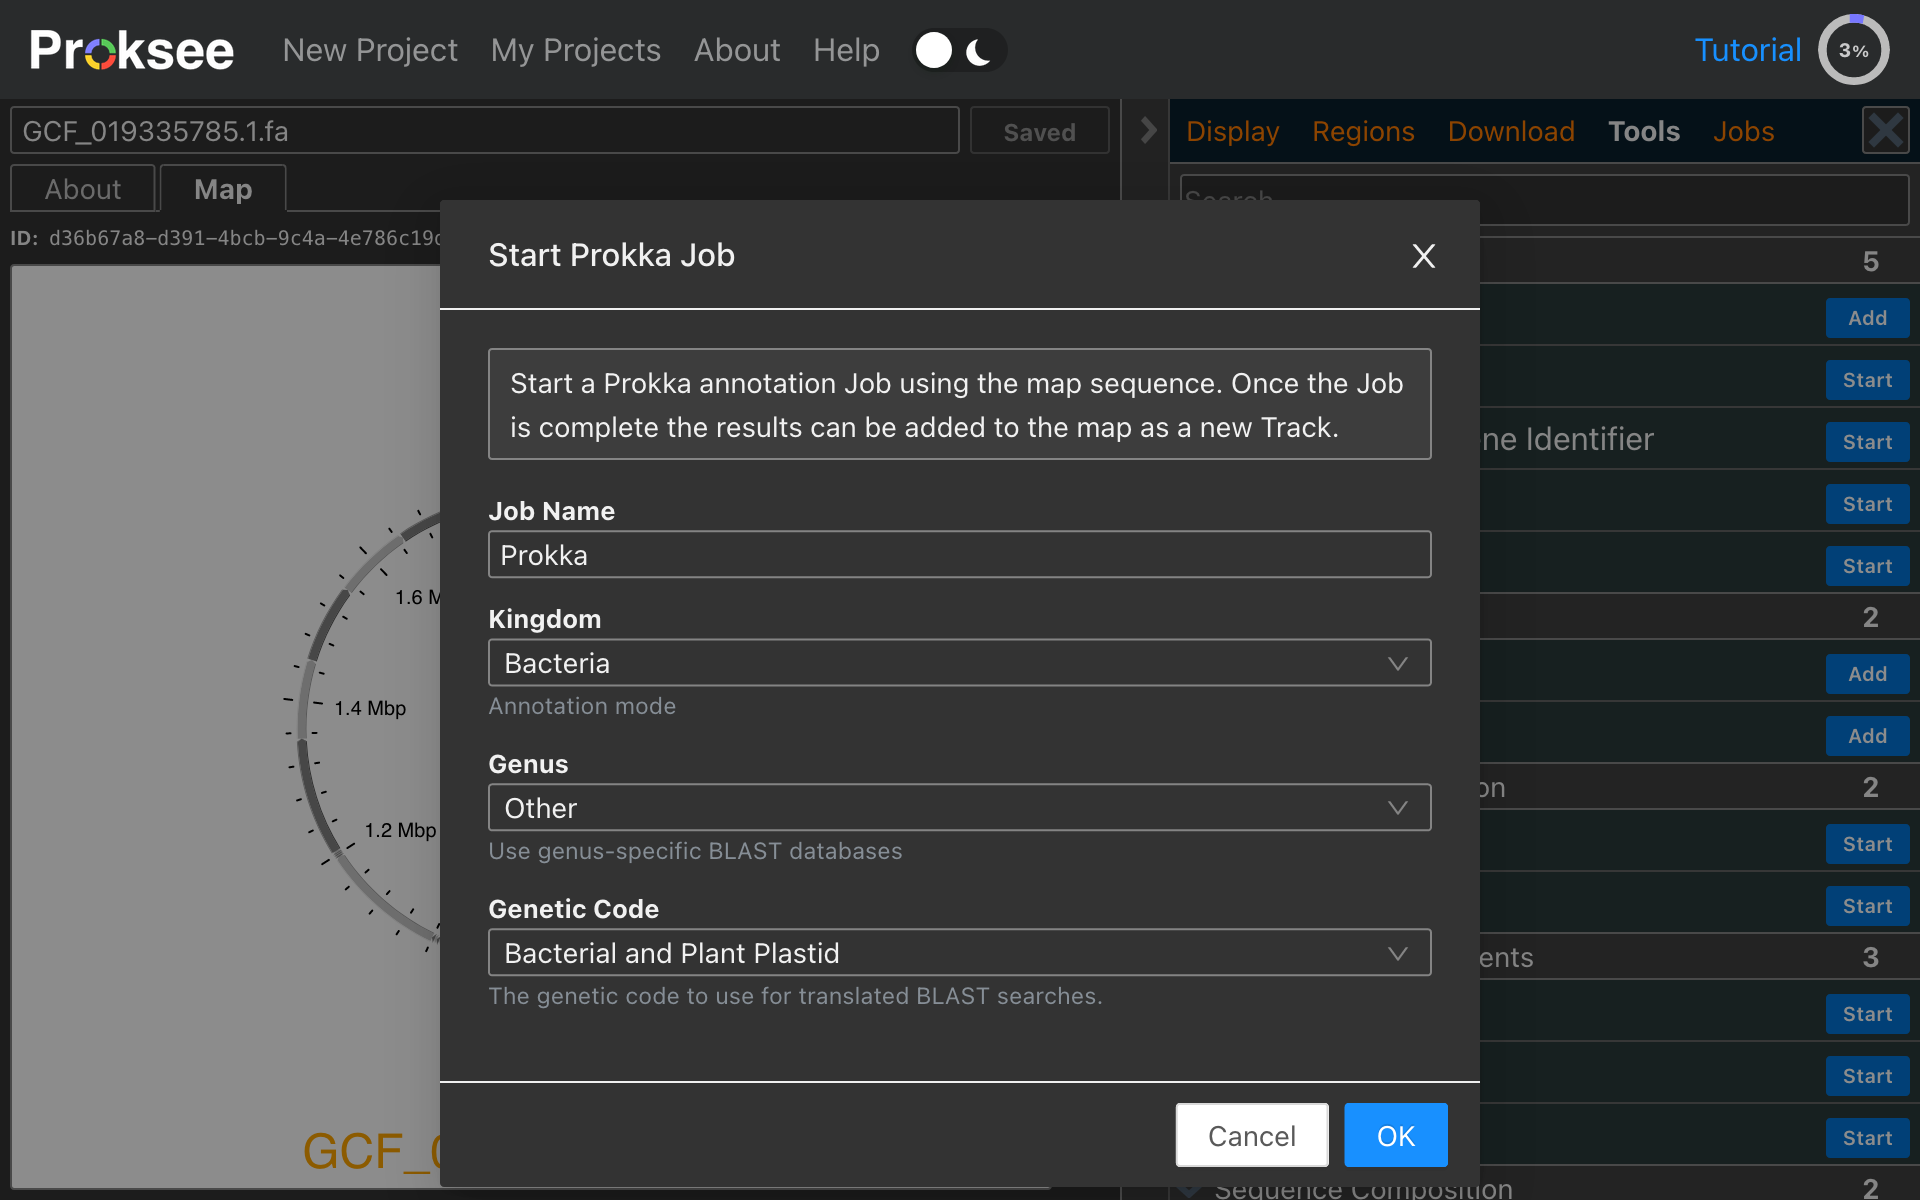
- In the Sidebar Tools panel, find the Prokka tool and click Start.
- The Start dialog will appear. Here you can change the Job Name and the settings used by the tool. In this tutorial we will use the default settings.
- Click the OK button to submit the job.
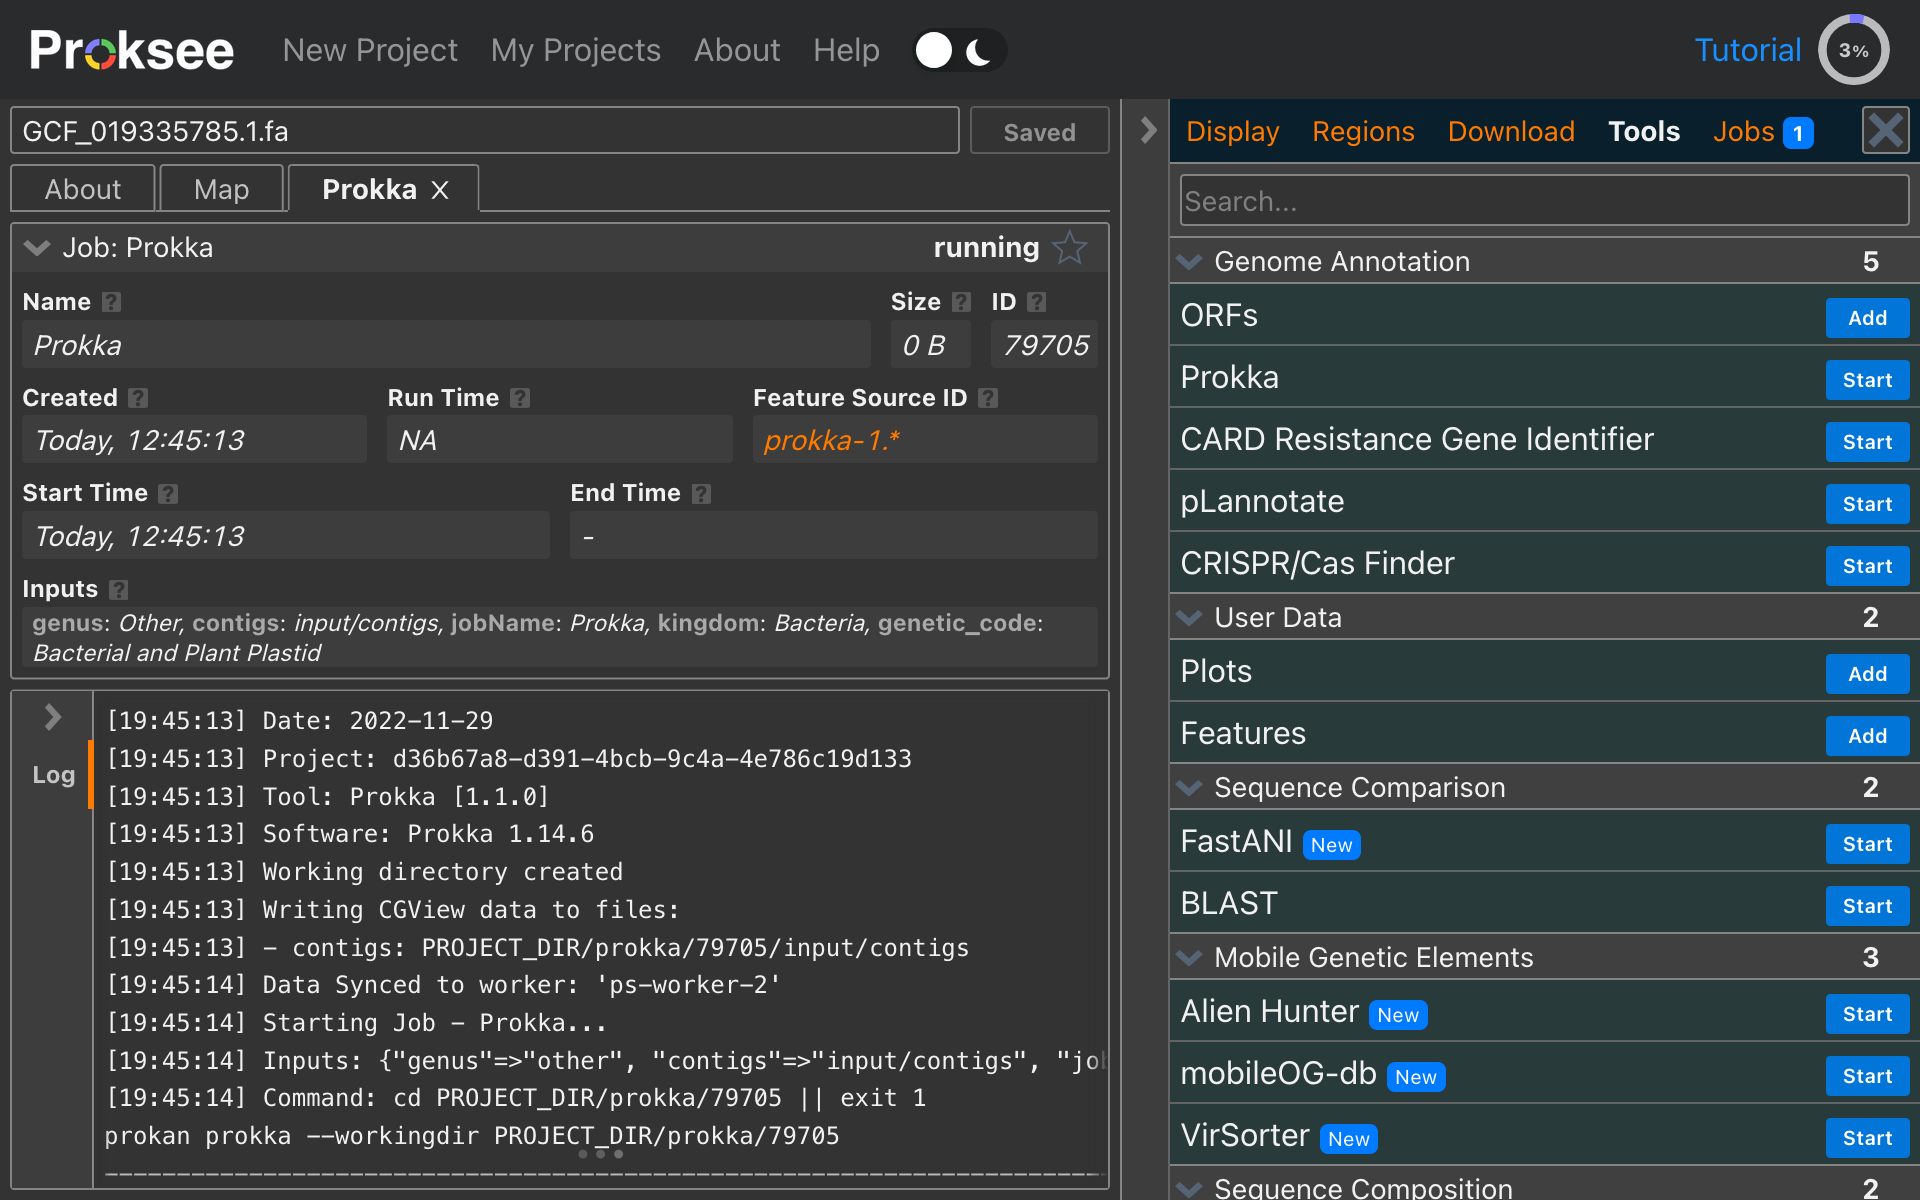
Job Tab
After submitting the job, a Job Tab will open up. The tab title will be named after the job name.
At the top of the Job Tab will be the Job Summary. The summary can be closed by clicking on the header (the header has a chevron on the left).
Below the Job Summary are the Job Cards. For running jobs, the only card available is the Log Card. The log will auto update as the job progresses.
Tip: the Job Tab can be reopened anytime by finding the job in the Jobs Panel and clicking the expand job tab button .
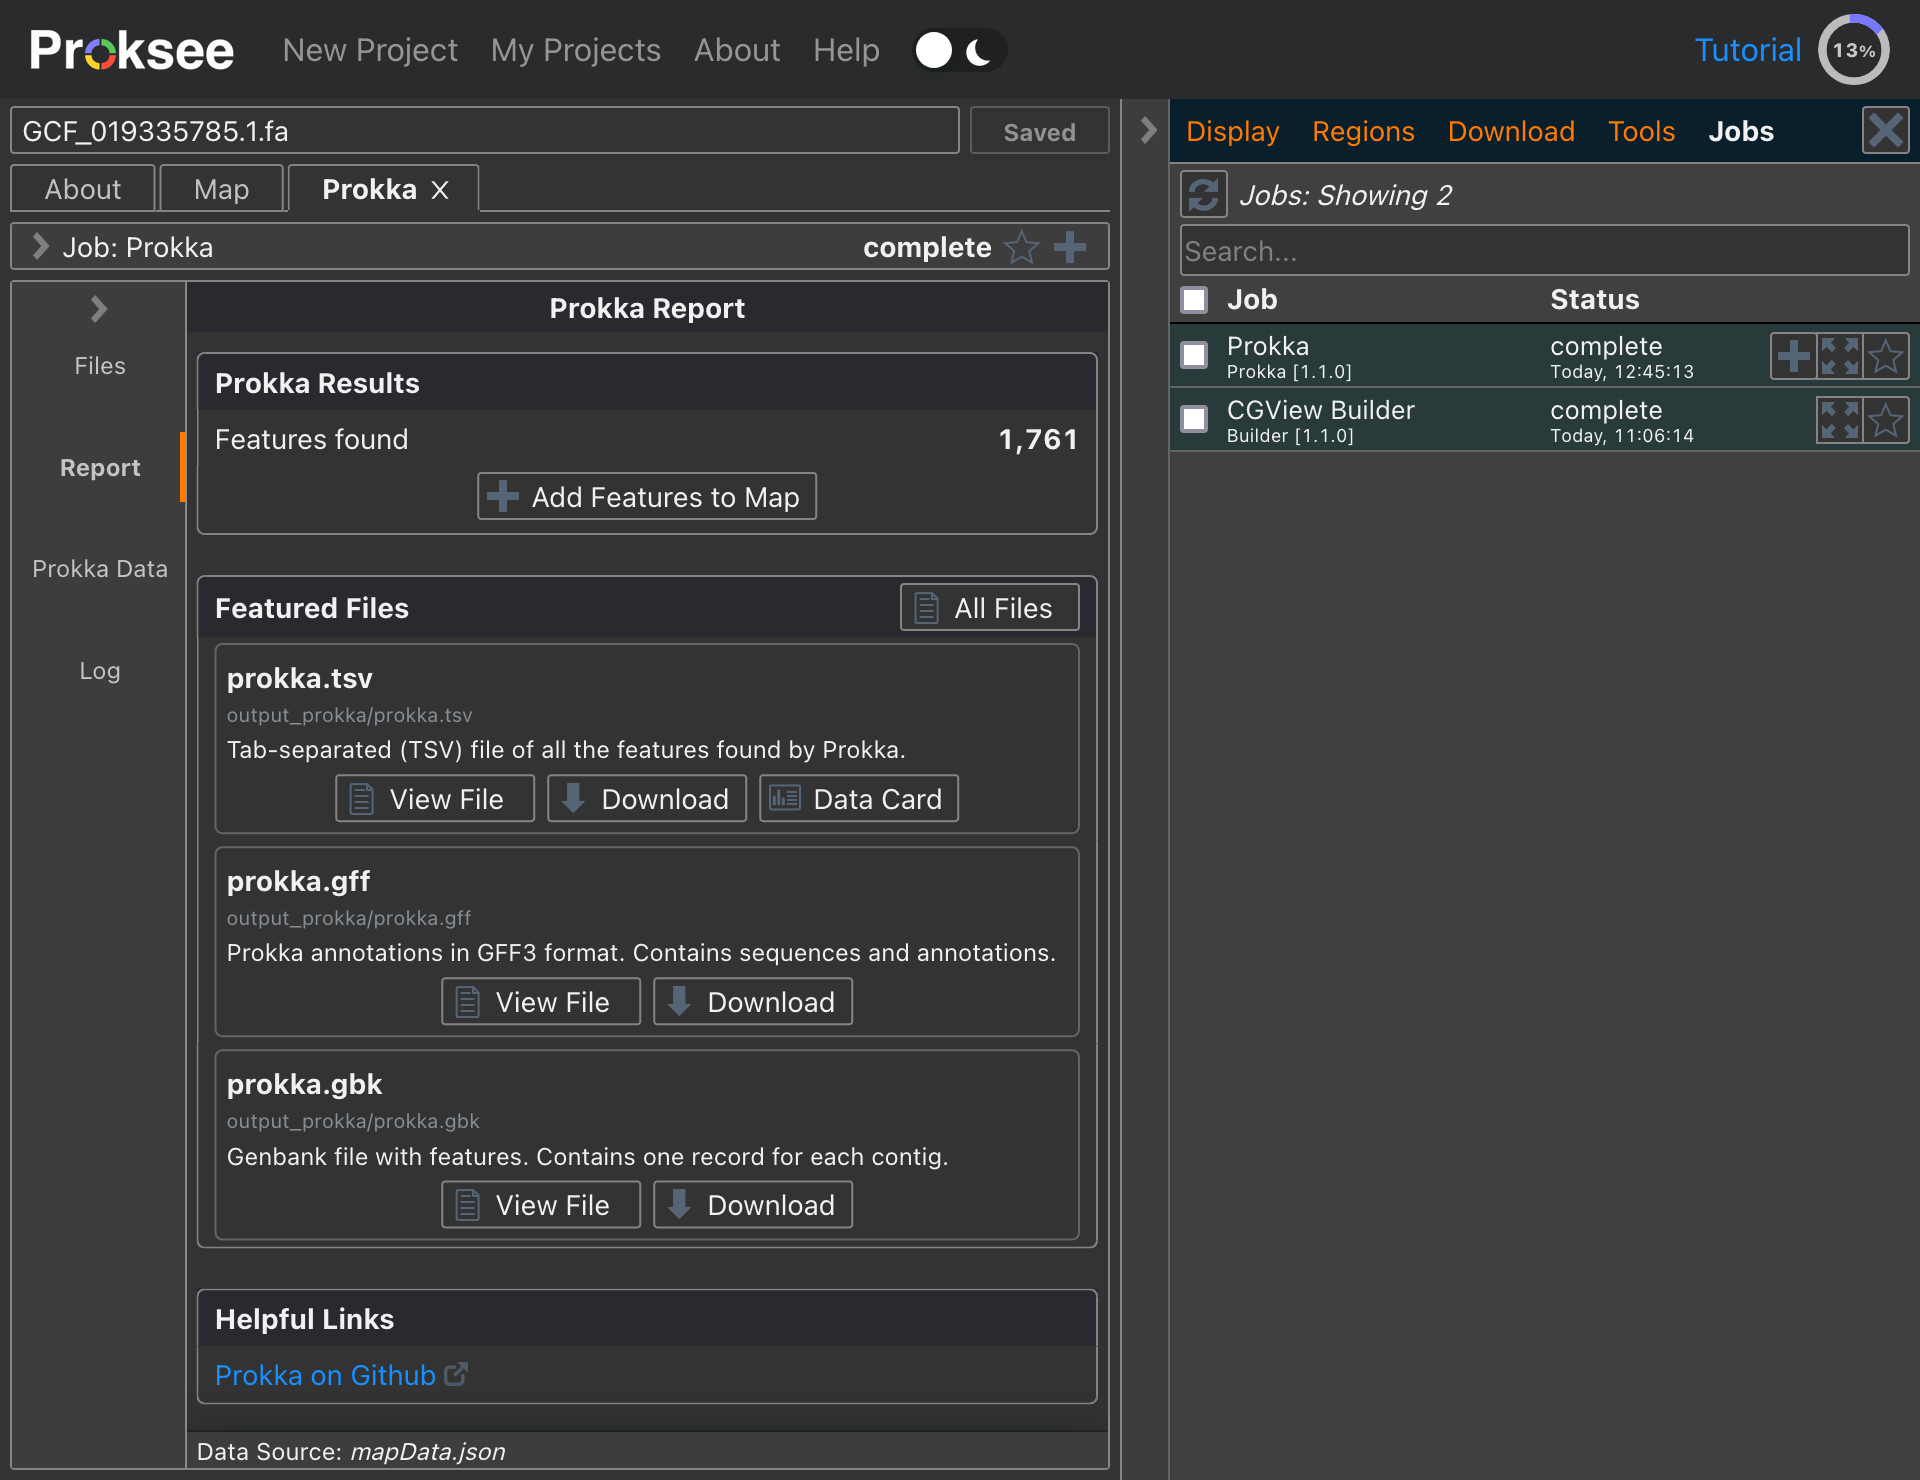
Job Report
When the job is complete, additional Job Cards will be available. Jobs will always have the Log Card, Files Card and Report Card. In addition, there may be tool specific Data Cards. The Files Card will show all the input and output files from the job. The Report Card (shown below) gives an overview of the job including, a summary of the features found, files of interest and helpful links.
Adding Features to the Map
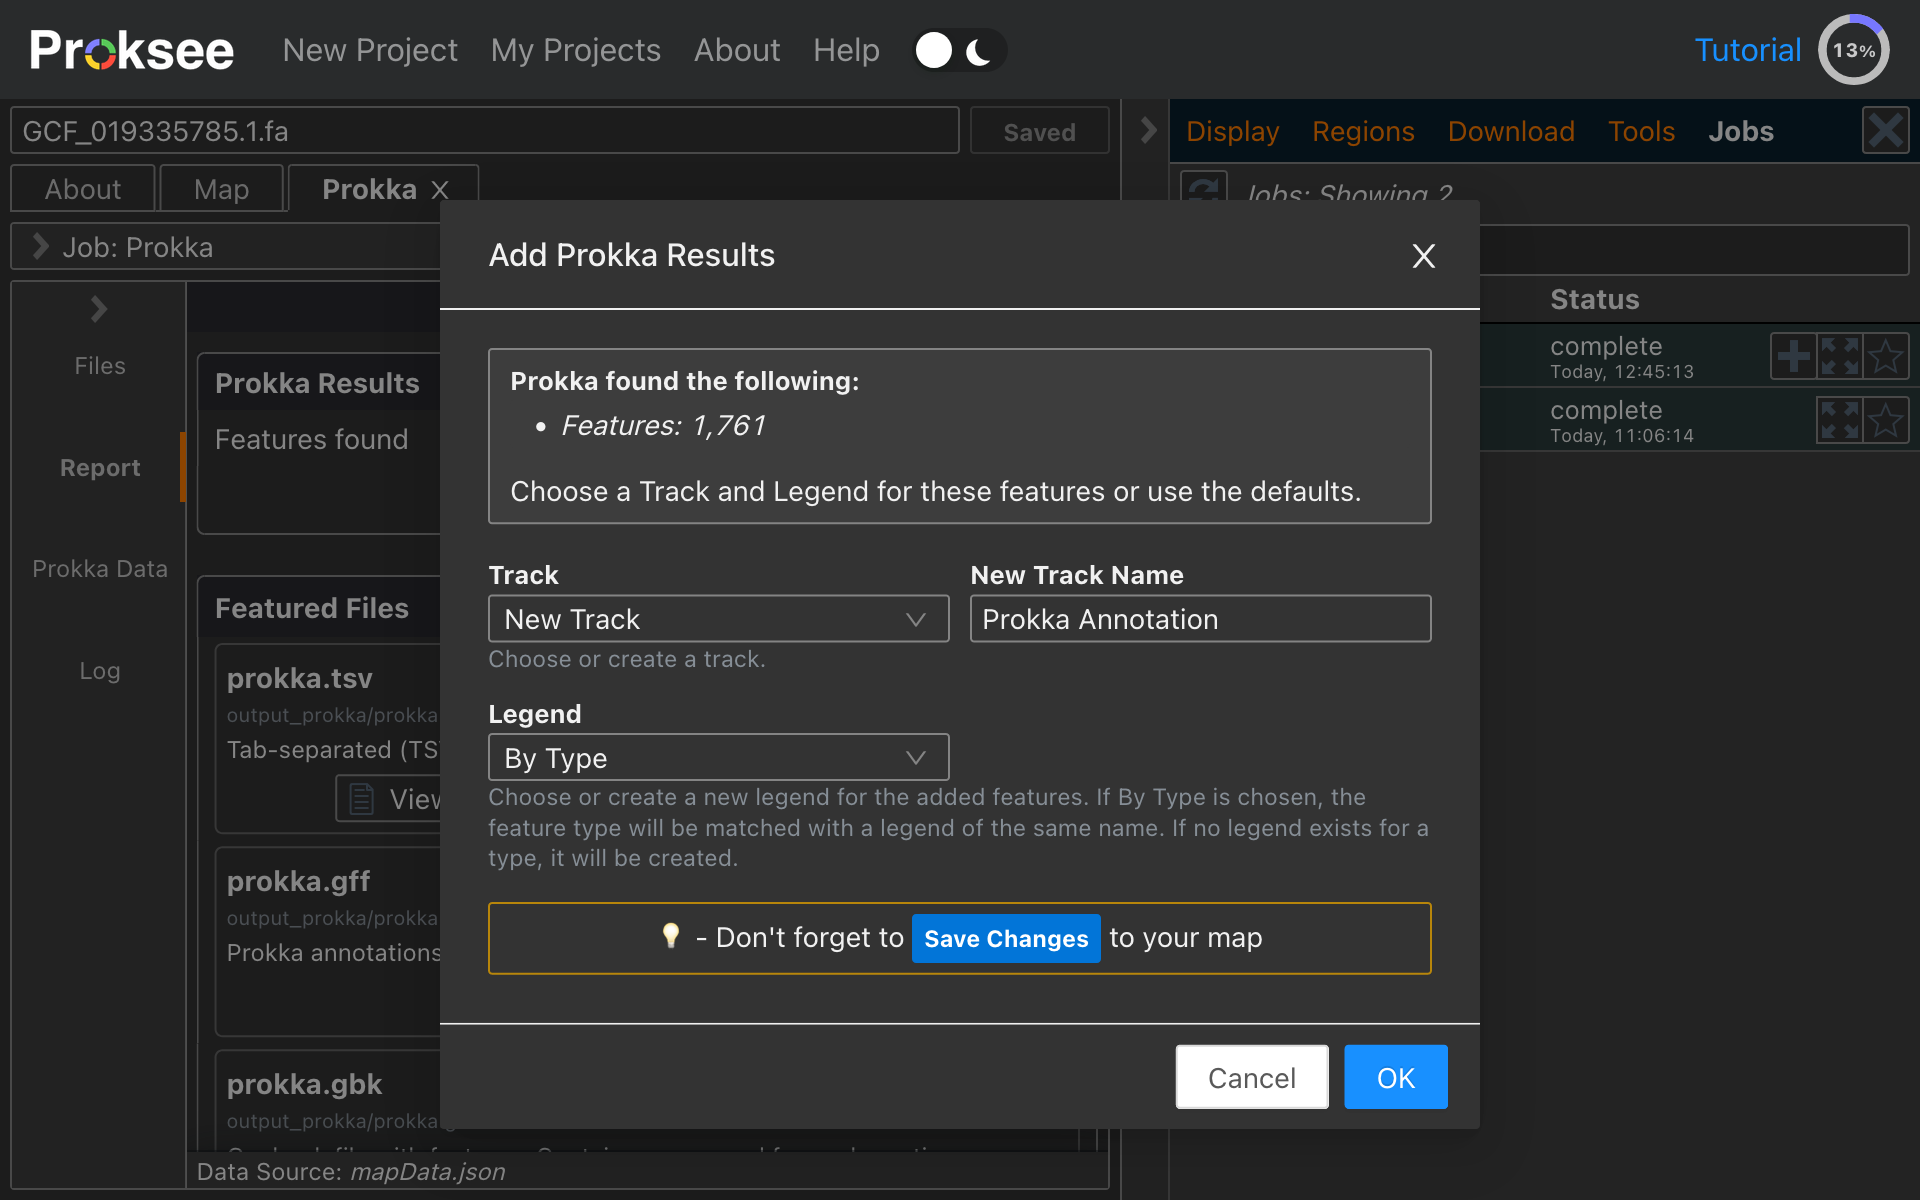
- In this example, Prokka found 1,761 features. Click the Add
Features to Map button at the top of the report to bring up the Add
Dialog (shown below).
- Note, that the Add button in the Job Summary header or beside the job in the Jobs Panel will also bring up the Add Dialog.
- In the Add Dialog:
- Choose or create the track to use for the added features.
- Choose or create the legend to use for the added features.
- Click OK
Saving the Map
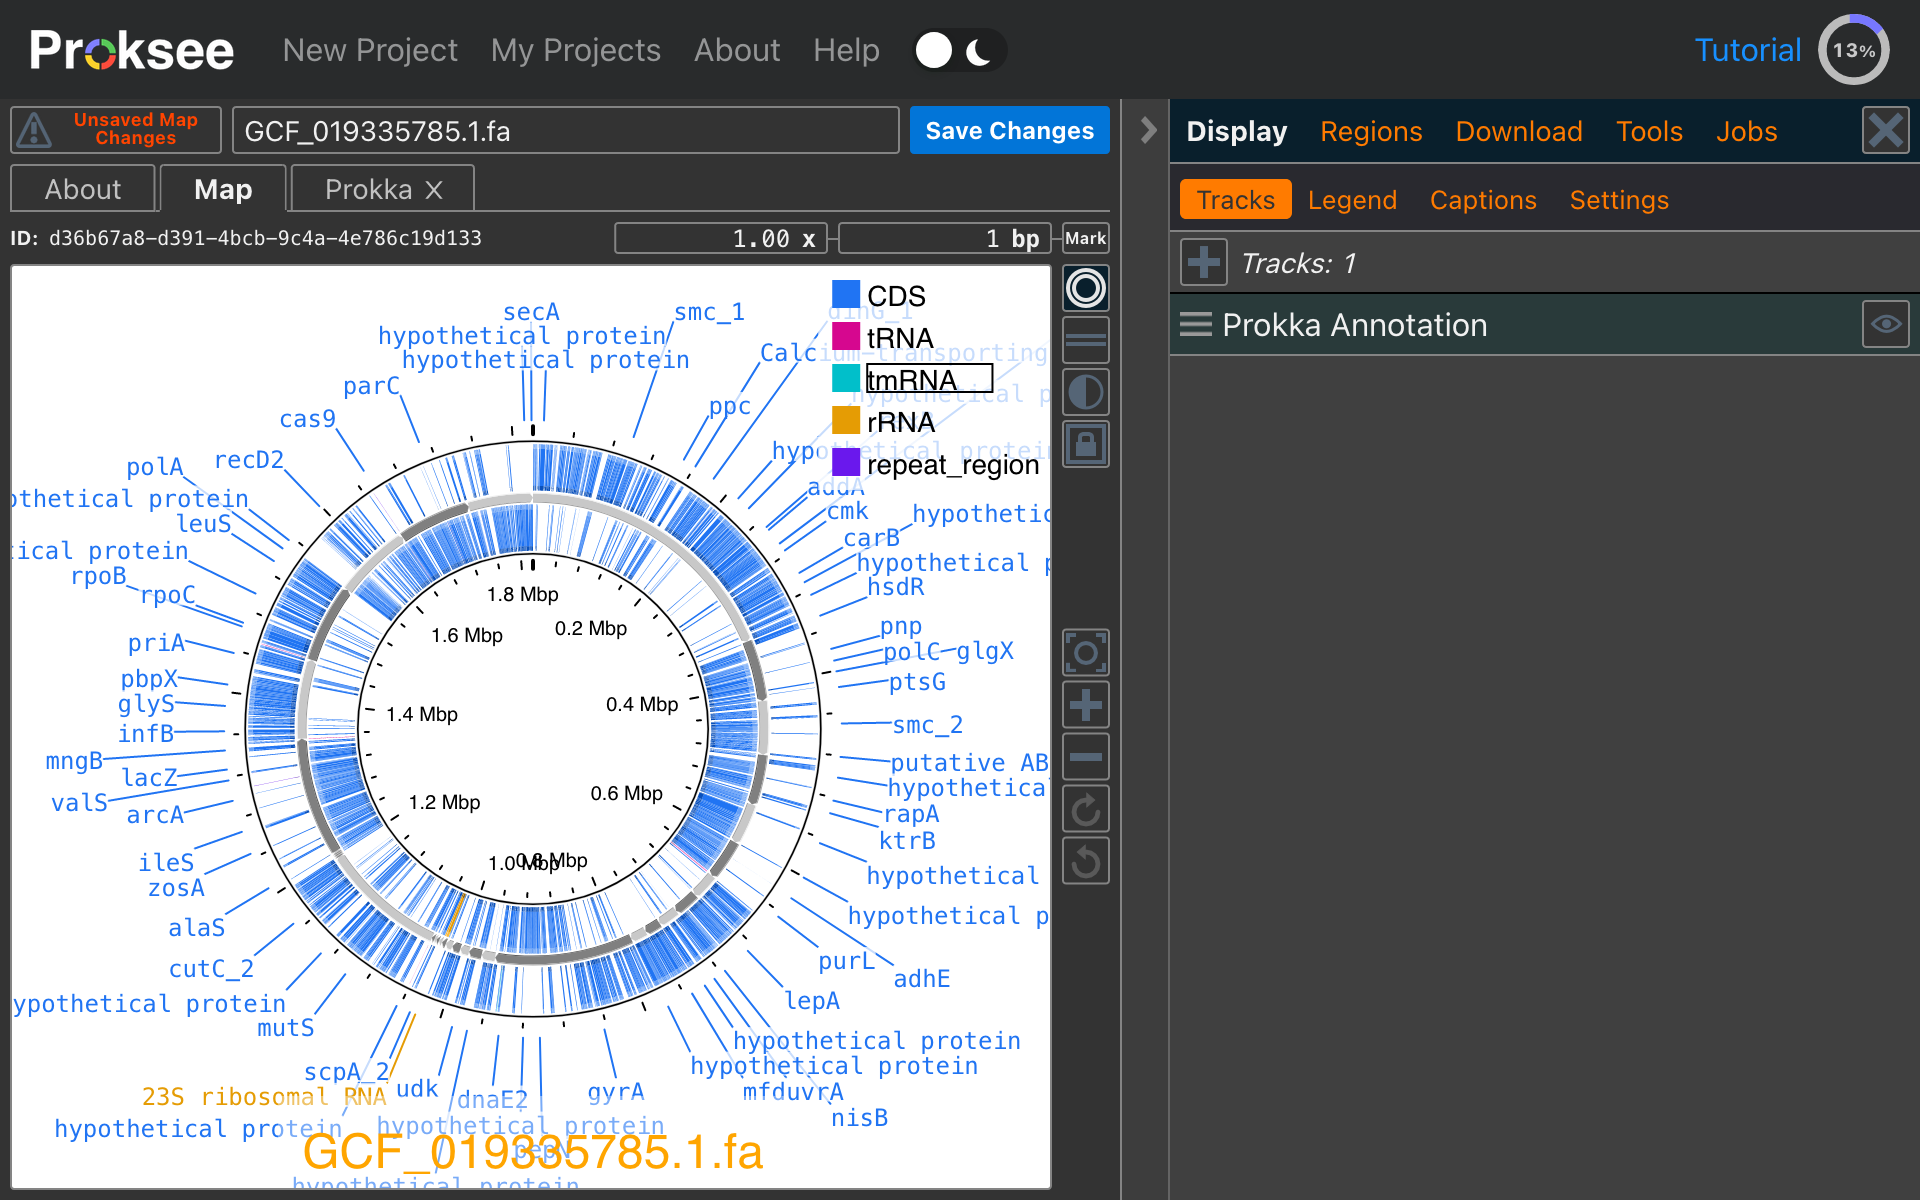
- After clicking OK, the map will be shown with the newly added features.
- Click Save Changes to save the updated map to the server.
- Important: Changes to the map are NOT automatically saved to the server. To see these features on the map, the next time the project is loaded, the changes must be saved.
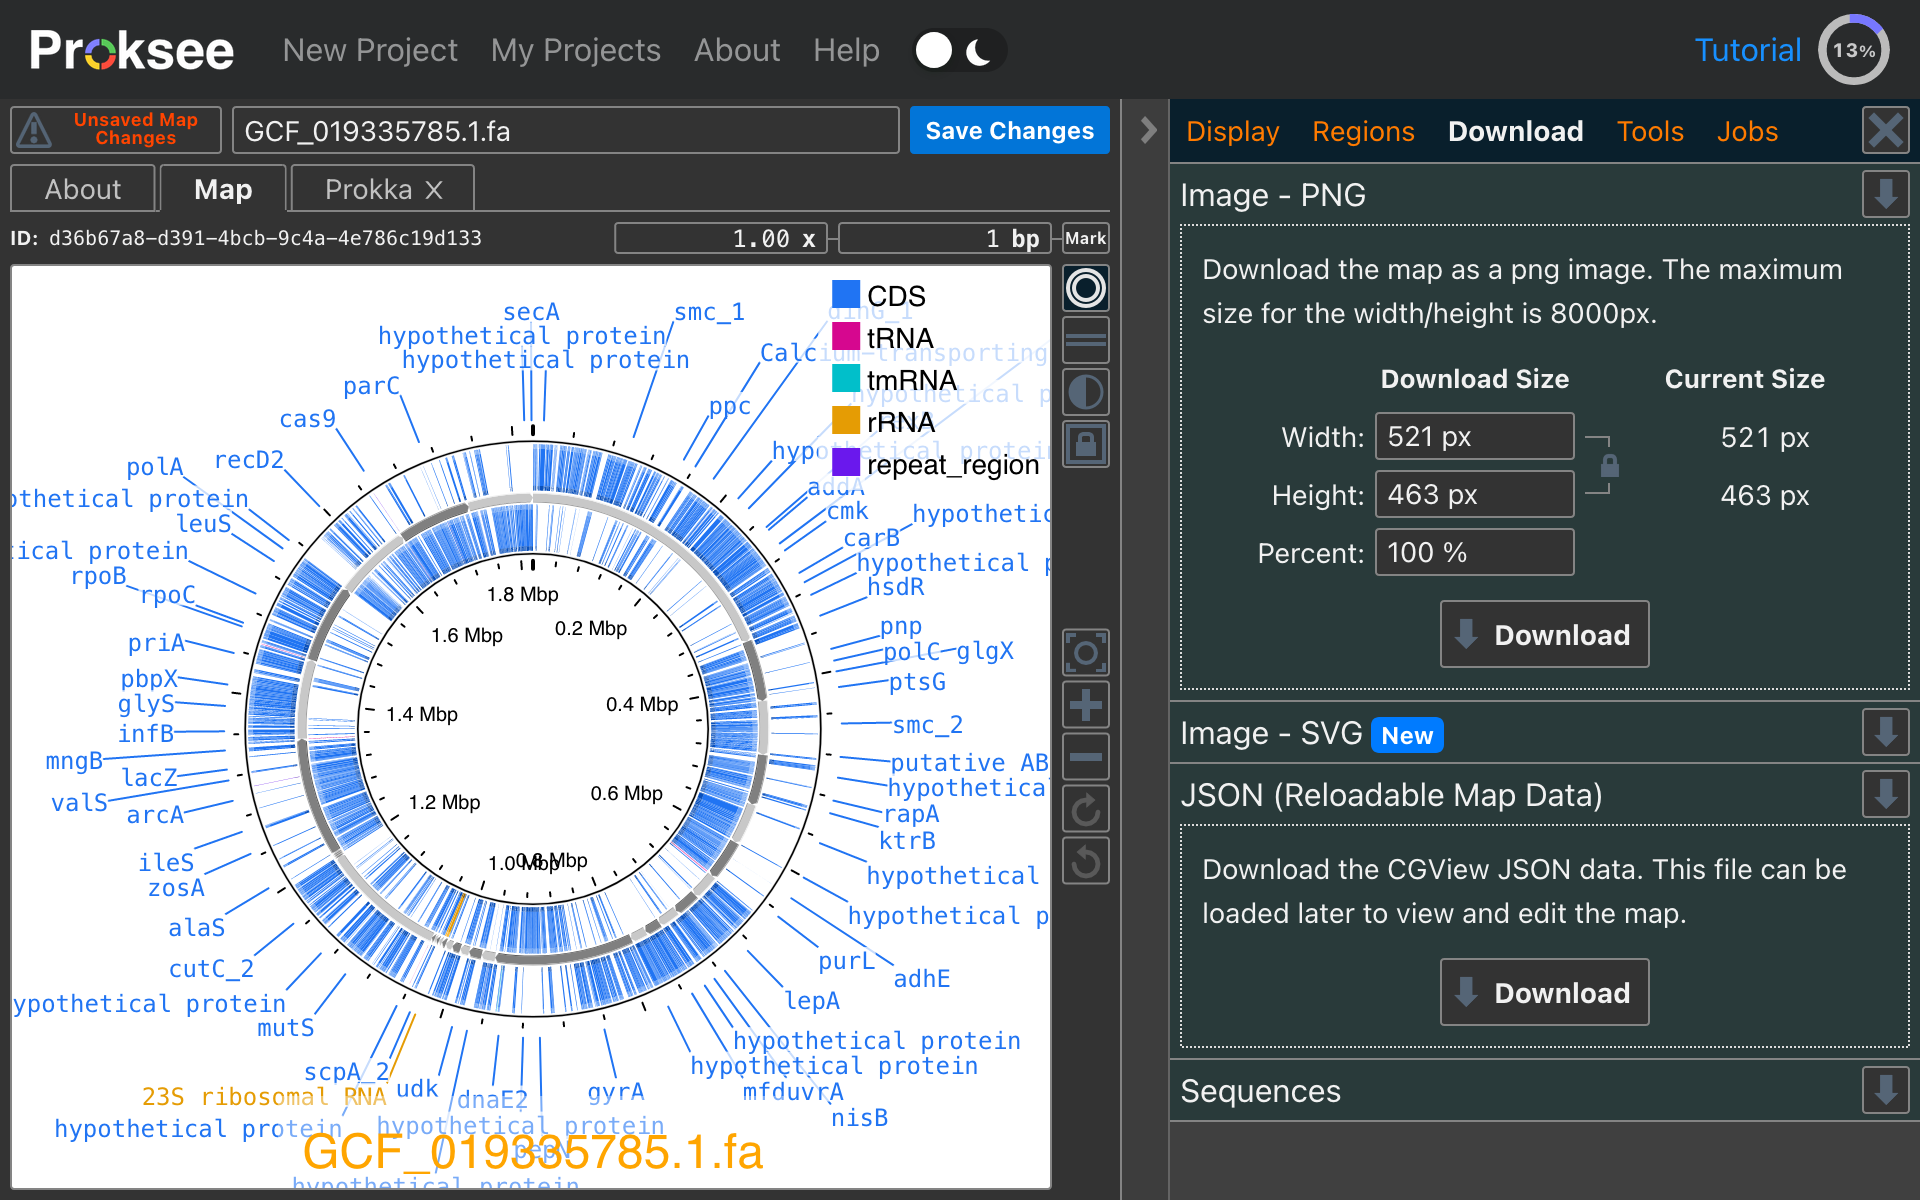
Downloading Results
- To download map data, go to the Download
Panel in the Sidebar:
- Images: Download a PNG or SVG image of the currently visible map region.
- JSON: Download a JSON file for the map. This provides an archive of the map that can be loaded into Proksee in the future.
- Sequences: Download nucleotide or amino acid sequences from the map.
- Individual job files can be downloaded from the Report Card or Files Card using the download buttons